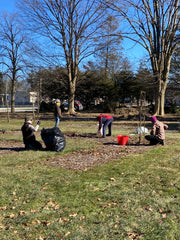
1. Choose a rose: a rose is essentially a flowering shrub. So keep size in mind when selecting. Make sure the rose is hardy to zone 6. Decide which is most important: fragrance, color, amount of thorns, disease-resistance, type of rose.
2. Location: full sun (4-8 hours). If shade is inevitable, morning sun with afternoon shade is preferred over morning shade with afternoon sun.
3. Planting: Potted roses can be planted most any time of the year, though LVRS recommends planting in the spring and late summer, due to our hot (and often dry) July and August. Bare root roses should be planted as quickly as possible, and are generally shipped in early spring. Roses sold in bags should be planted in the spring.
4. Planting, part 2: Dig a hole 18" wide and deep. Add 50% compost to the soil. Carefully place the rose in the hole so that the bud union is at grade, or that the crown is at grade. Planting lower is better than planting higher. Water the rose and add soil if needed. Mulch is helpful to preserve soil moisture.
5. Water. Much of the Lehigh Valley has clay soil. If you hit water when you dug your 18" hole, you will need to be careful about watering: too much and your roots will rot. In general, 1" of water a week is sufficient for a new rose planted in native soil. Established roses rarely need watering (due to all that clay!). Roses planted in raised beds or containers will require weekly watering.
6. Fertilizing. LVRS has its own custom organic fertilizer with mycorrhizal fungi to help root growth. While roses will live without feeding, routine applications of an organic fertilizer 4-6 times during the season will ensure your rose reblooms with vigor.
7. Pruning. Roses bloom on new wood. Pruning in the spring around the time that the forsythia blooms is a good way to rejuvenate your rose. Different types of roses are pruned differently, so contact LVRS for help with how to prune your particular rose.
8. Enjoy! And then start planning where to plant your next rose!
If you have questions, or want to learn more about the care and cultivation of roses, join LVRS and ARS! We love to talk roses, compare notes and find out what new things are happening in the world of roses.
]]>As of August 4, 2021, our organization has raised: $2,235.01 for the Bethlehem Rose Garden. Thank you to all of our generous donors!
It was spent as follows:
Gardening Tools for the Bethlehem Rose Garden Storage Shed:
Amazon - 6 Ames Hand Cultivators - $50.86
Amazon - 6 Ames Hand Weeders - $67.62
Amazon - 6 Ames Hand Trowels - $40.50
Lowe's - 6 Two-Gallon Watering Cans - $31.67
Amazon - 2 (Pairs) Pine Tree Tools Bamboo Gardening Gloves (Small) - $27.94
Amazon - 2 (Pairs) Pine Tree Tools Bamboo Gardening Gloves (Medium) - $27.94
Amazon - 2 (Pairs) Pine Tree Tools Bamboo Gardening Gloves (Large) - $28.78
Amazon - 2 (Pairs) Pine Tree Tools Bamboo Gardening Gloves (X-Large) - $27.94
Amazon - 2 (Pairs) Pine Tree Tools Bamboo Gardening Gloves (XX-Large) - $27.94
Lehigh Valley Home & Garden Center - 5 Collapsible Garden Containers - $60.00
Lowe's - Garden Cart - $51.94
Target - Measuring Cups for Fertilizer - $16.96
Target - Epoxy to Repair Watering Can - $3.91
Lowe's - Garbage Bags - $16.94
Lowe's - Buckets & Lids for Fertilizer Ingredients - $20.80
Lowe's - Dustpan & Broom for Storage Shed - $14.82
Lowe's - Scissors (for opening fertilizer bags) & Paint Markers (for labeling tools) - $8.44
Subtotal: $525.00
Roses for the Bethlehem Rose Garden:
Lehigh Valley Rose Society - 5 "Gourmet Popcorn" Potted Roses - $125.00
Lehigh Valley Rose Society - 6 "Pink Snowflakes" Potted Roses - $150.00
Lehigh Valley Rose Society - 3 "Coffee Bean" Potted Roses - $75.00
David Austin Roses - 4 "Claire Austin" Bareroot Roses - $144.95
Chamblee's Roses - 4 "Peggy Martin" Potted Roses - $102.80
High Country Roses - 8 "Cupid's Kisses" Potted Roses - $109.27
(30 roses total)
Subtotal: $707.02
Fertilizer Ingredients and Soil Amendments for the Bethlehem Rose Garden:
Home Depot - Compost - $58.48
4 Seasons Garden Center - Fertilizer Ingredients - $28.50
Lehigh Valley Home & Garden Center - Fertilizer Ingredients - $51.94
Herbein's Garden Center - Fertilizer Ingredients - $103.90
Lehigh Valley Home & Garden Center - Fertilizer Ingredients - $16.99
Lehigh Valley Home & Garden Center - Fertilizer Ingredients - $75.00
Lehigh Valley Rose Society - 15 Cups of MycoApply - $111.00
Lehigh Valley Rose Society - 7 9/16 Cups of MycoApply - $55.96
Nescopeck Agway - Fertilizer Ingredients - $101.90
Lehigh Valley Home & Garden Center - Fertilizer Ingredients - $27.00
Herbein's Garden Center - Fertilizer Ingredients - $16.98
(These add up to enough ingredients to blend fertilizer for 908 individual rose feedings, with some ingredients left over and some ingredients we've currently run out of).
Subtotal: $647.65
Merchant Processing Fees for Donations Made By Credit/Debit Card:
Shopify - $1.03
Shopify - $1.03
Shopify - $0.88
Shopify - $0.45
Shopify - $0.88
Shopify - $1.75
Shopify - $3.04
Shopify - $1.75
Shopify - $3.20
Subtotal: $14.01
TOTAL SPENT: $1,893.68
FUND BALANCE: $341.33
Our next planned purchase is a gas-powered walk-behind edger to straighten out the edges of the garden beds. If you are interested in making a contribution, we are currently looking for additional tools to keep in the storage shed. Our wishlist can be found here: https://a.co/4Gu7zgY. We are also currently looking for donations of the following Espoma products: Greensand, Alfalfa Meal, & Kelp Meal.
Most of this time, LVRS members have been using their personal tools in the garden. I personally have gone through 2 pairs of loppers, a handful of pruning shears, and 2 garden shovels that I've replaced out of pocket. LVRS members have been lugging their personal tools back and forth (a pain!) and wearing them out and replacing them. Sometimes, community volunteers come to offer their help gardening and we lend out our own personal tools. Our goal is to have a well-stocked storage shed so LVRS members no longer have to use their personal tools and so community volunteers without their own tools, also have tools to use.
Next, a good set of goatskin or leather gloves to protect your hands from prickles, aka thorns, is also recommended. A wad of newspaper can serve in a pinch, but gauntlet goatskin gloves will ensure you emerge scratch free from your bushes. Several members recently purchased gauntlets from Bear Wallow Gloves, we'll post a review later this year. Additional protection should be used when handling chemicals, we will cover that in another post.
For climbing roses, you'll also need a method of tying your roses to train them. Strong cord is essential, but plastic zip-ties work too. Either way, be sure to allow for movement and growth of the branches.
Before you head out to prune your roses, give your tools a thorough cleaning and sharpening. While pruners should be sanitized regularly, over the course of a season, they can get build-up from sap. Rub the blades with a bit of steel wool. If the blades are particularly dirty, use a crumpled piece of aluminum foil, a neutral oil and some salt for cleaning: oil the blades, sprinkle with salt and rub clean with crumpled foil, then wipe dry. Sharpening can be done using a stone or a file, we recommend you search youtube and find a method that works for you. A light spray with WD-40 and you'll be ready for the season. A sharp blade is a safe blade!
While you are working in your garden, remember to sanitize your pruners each and every time you move to the next rose bush. Rose Rosette Disease has been reported in the Lehigh Valley, and keeping your pruners clean will help avoid the spread of it, or any other fungal disease. An alcohol based spray or sanitizing wipes (with the pandemic, there's plenty available if you don't already have some), or a jar with some disinfecting mouthwash are simple, easy ways to sanitize your pruners while you are working. Be mindful about brushing up against your plants, and, if you are working at the HBRG, we recommend you change clothes when you get home before going out into your own garden.
If you have tools other than those mentioned that you rely on when working in your rose garden, please let us know in the comments below. Happy gardening!
]]>Of the six winners, four are recommended for our region, Northeast, and were recommended based on observations at the Queens Botanical Gardens in Flushing, NY and the Arboretum State Botanical Garden of Kentucky in Lexington KY. The selected roses are:
Brick House™ - Regional Choice Award Winner in the Northwest, Northeast, and South Central Regions.
Bred by Meilland®. Introduced by Star Roses & Plants. Brick House™ has a strong, dark red flower color and reblooms throughout the season with a lot of flower power on each flush. A floribunda with 10-12 petals per slightly fragrant bloom and dark green matte foliage. It has excellent disease resistance for the type and performs well on its own roots. Blue Ribbon™ Winner for outstanding, low water performance in 2017-2019 Water Use Classification of Landscape Species (WUCOLS) trials.
Brindabella Purple Prince™ - Regional Choice Award Winner in the Northeast, South Central, and Southwest Regions.
Bred by Sylivia E. and John C. Gray. Introduced by Suntory Flowers in partnership with Dig Plant Company. A compact shrub rose with upright habit that is somewhat reminiscent of a hybrid tea rose, only more freely branched and more densely foliaged; quickly growing to 3 ft and approaching 4 ft in 2 years time. High-centered, doubled flowers that are dark red-purple with a very strong traditional rose perfume.
Easy to Please™ - Regional Choice Award Winner in the Northeast, Northwest, South Central, and Southeast Regions.
Bred by Christian Bédard. Introduced by Weeks Roses. A fragrant floribunda with glossy, medium green foliage. This high-performing rose produces loads of classically spiraled fuchsia pink flowers with a lighter reverse and a mild clove fragrance with hints of cinnamon. All of this flower power comes on an upright, vigorous plant that has more disease resistance than many landscape roses.
Sweet Spirit™ – Regional Choice Award Winner in all regions and Fragrance Award Winner.
Bred by Meilland®. Introduced by Star Roses & Plants.
All roses entered into the AGRS™ are tested for two years in six different geographical regions, each containing two test gardens. Additional characteristics that are evaluated include: vigor, foliage proportion, plant habit, flowering effect, rebloom habit, bloom form, aging quality of blooms, fragrance and hardiness. In order for a variety to be granted an award, it must demonstrate superior performance in at least least three of the six regions entered. By recognizing and recommending the best garden-worthy rose varieties for the various regions of the United States through testing, the AGRS™ has the goal of providing objective and reliable information to the general public. For a complete list of the 2021 winners and to learn more about the American Garden Rose Selections™, visit americangardenroseselections.com.
]]>The Bethlehem Rose Garden now has a design in place by Pam Ruch (a local horticulturist) and Stephen Scanniello (a well-known rose garden designer/consultant). The design calls for transplanting all of the roses in the central rectangular beds to the outer rings to make room for new roses in the center of the garden.
On January 23rd, members of Lehigh Valley Rose Society got together in the Bethlehem Rose Garden to discuss pruning the roses and getting everyone on the same page. We got the rectangular beds in one of the quadrants pruned and felt that it was time to "call it a day," in the cold winds of January!
The following Saturday (January 30th), was the "Community Winter Pruning" event. We had a great turn out of local volunteers that braved the cold and we managed to get the rectangular beds in the other 3 quadrants pruned.
We've set a date of February 20th to start pruning the roses in the outer rings of the rose garden (listed on our "Calendar" page).
Back in April, when I was researching different chapters of the American Rose Society, I was specifically looking for ways they stay active, engaged, financially solvent, and, overall - successful. One of the things I came across in my research was Portland Rose Society's customized blend of fertilizer. They came up with their own blend (they have a third party do the blending and packaging) and sell it as an ongoing fundraiser. They sell it online, to their members (and the public) at various events and meetings, and through a couple of the retailers local to them.
Brilliant! This is something that their own members need on a regular basis (these members can shift their purchases from various other brands of rose fertilizer to a brand that specifically supports the organization to which they belong). It also is a great source of advertising for their organization. These bags are featured in various garden center locations in the Portland area with the Portland Rose Society logo prominently displayed. They are featured in the fertilizer section within other brands of rose food (being displayed to anyone that grows roses who would be looking for rose fertilizer). These people would see not just a product that benefits them while financially supporting the mission of said rose society, but it also serves as a way to potentially recruit a new member! "Oh I didn't know there was a local rose group, I'll have to look into joining!"
I knew it was something I'd want to pursue for our local chapter. I reached out to a couple different fertilizer manufacturers and had some great discussions, but unfortunately, found it to be out of our reach financially (many wanted an initial investment of $6,000 - $10,000 or more) for the packaging design and printing, registrations/licensing, and initial batch of the actual product. Not to be discouraged, I decided that I would do my own blending and packaging, and handle the registrations/licensing with the PA Dept of Agriculture myself.
After purchasing several different ingredients from several different local retailers, (and making about 15 different blends and trying them out on my own personal roses), I honed in on specific ingredients and a specific N-P-K rating that seemed to show the most promising results. I found a couple suppliers to purchase ingredients from at wholesale pricing, placed a bulk order of enough ingredients to do at least 100 bags (though because of the quantities the ingredients are sold in, there's enough of certain ingredients for anywhere from 150 - 250 bags, so for the next round of blending, I will only need to reorder one or two ingredients to do another 100 bags), designed and printed labels, and filed all of the paperwork with the PA Dept of Agriculture. My initial investment? Well it's known to LVRS members that read our financial reports, but suffice it to say much less than the $6,000 - $10,000!
Our fertilizer is a blend of all-natural and organic ingredients, with an N-P-K rating of 4-3-3. It also features a blend of 7 mycorrhizal fungi which help to promote root growth, creating a healthier plant that can better stand up to environmental extremes.
Each bag has enough fertilizer to do one feeding for up to 20 established roses or one feeding for up to 10 newly transplanted roses.
The retail price is $14.15 (so with sales tax included, it comes to $15.00 even). The price for LV Rose Society members is $11.32 (with sales tax included, it comes to $12.00 even). Click here to read more and make a purchase!
]]>Symptoms of RRD have been noticed at least as far back as the 1940's, but only as recently as 2011 was it determined that it was caused by a virus.
The virus is aptly named Rose rosette emaravirus:
(Photo by Inga Ludenberg)
and is in a genus of plant viruses with 10 other recognized species. The virus is primarily transmitted by the eriophyid mite Phyllocoptes fructiphilus:
(Photo by Tobiasz Druciarek)
but can also be transmitted via grafting. The virus is not soil borne, but if infected roots are left in the soil after a rose is removed, it could potentially infect new, healthy roses. The mites are microscopic - 3 to 4 times smaller than an average spider mite. They can be transported by wind or by garden tools. For example, if you are pruning a rose that has the mites, they can "hitch a ride" on your pruning shears. When you move onto an uninfected rose, you could be inadvertently spreading the mites (and therefore the virus) to originally healthy plants. As the mites feed on the plant, they infect it with the virus. Symptoms appear on new foliage in the spring. By the time symptoms appear, the entire plant is infected and must be removed. If left in place, roses typically die within 2 to 3 seasons, and the longer they are left in place (not removed and destroyed) the more likely the disease is to spread to other roses.
Allentown Rose Garden lost over 700 roses last year from the disease. It is currently not treatable but scientists are researching several varieties of roses to determine if any are resistant or immune and will then work with rose breeders to try and develop roses that are immune to the disease.
In the Bethlehem Rose Garden, I went around and tagged about 3 dozen roses with symptoms of RRD for removal and over the past couple Saturdays, I've been working on removing them. What was I looking for? I was looking for what gives the disease it's nickname "witch's broom" pictured here:
(Photo by Jennifer Olson)
Clusters of distorted, brush-like shoots and branches that originate from the same point. This is usually followed by defoliation and dieback. Oftentimes, these clusters start off as red or yellow, eventually becoming brown and dead.
Other possible symptoms (they really depend on the specific variety of rose, though these "witch's brooms" are a telltale sign), are excessive thorns and thickening of shoots/stems.
(Photo by James W. Amrine, Jr.)
Here, you can see a substantial difference in the thickness and the number of thorns between a RRD-infected rose and an uninfected rose of the same variety. However, certain varieties of roses do naturally have excessive thorns, so you have to be familiar with the specific variety of rose you are looking at and what a typical specimen from that variety should look like.
Other common symptoms of RRD-infected roses are branch/shoot dieback, reduced winter hardiness, and increased susceptibility to other diseases.
Here are some additional photos as examples:
(Photo by M. A. Hansen)
Can I prevent RRD? There are certain steps you CAN take to try to prevent RRD.
Miticide:
Certain miticides actually stimulate production of spider mites. So if you would like to use a miticide as a preventative measure, look for a miticide that prevents both eriophyid and spider mites, such as:
Cultural Control:
Removing and properly disposing of RRD-infected roses as soon as possible is extremely important to help prevent the spread. Roots, leaves, and other parts of the plant should be carefully removed. Debris should be removed by hand rather than with a leaf-blower and carefully bagged. It is recommended to wait several months before transplanting healthy roses.
Roses that are well-spaced so that stems/leaves do not touch each other helps prevent eriophyid mites from moving plant to plant and mixing in other plants between roses also helps.
Maintaining healthy roses is also a good way to help fight off diseases/pests. Watering when needed, testing soils and amending accordingly, and controlling other diseases and pests help maintain a healthy rose bush which in turn makes it less susceptible to infection.
It is also important to clean any garden tools that may come into contact with a RRD-infected rose. You can dip your pruning shears in bleach, or wipe them off with disinfectant wipes (Lysol®, Clorox®, Seventh Generation®, etc.) Digging up the roots? Be sure to disinfect your shovel. Wearing gardening gloves? Disinfect those too! Make sure to be vigilant. The past couple Saturdays that I've been working on removing roses at the Bethlehem Rose Garden, I've unloaded the trunk of my garden tools into my driveway (which is away from any of my plants). I immediately disinfect every. single. tool. that I brought with me, then hang them up in their rightful place on the pegboard in my garage. Recently, someone remarked to me, "I remember my father walking around with a jar of Barbicide® and he would dip his pruning shears in it after he pruned each plant." Smart man!
----------
Have any questions? Feel free to add a comment at the bottom of this post or email: info@lvrosesociety.org.
----------
Works Cited:
Hong, Chuan, et al. “Rose Rosette Disease.” Virginia Cooperative Extension, Communications and Marketing, College of Agriculture and Life Sciences, Virginia Polytechnic Institute and State University, 2012, www.pubs.ext.vt.edu/content/dam/pubs_ext_vt_edu/450/450-620/450-620_pdf.pdf.
“Rose Rosette.” Missouri Botanical Garden, www.missouribotanicalgarden.org/gardens-gardening/your-garden/help-for-the-home-gardener/advice-tips-resources/pests-and-problems/diseases/viruses/rose-rosette.aspx.
What to Look For - Rose Rosette, Center for Invasive Species and Ecosystem Health, University of Georgia, roserosette.org/what-to-look-for/.
Recently, I purchased a membership to "Newspapers.com" which has a lot of functionality in terms of being able to search for archived newspaper articles. I was so excited to find an article last night that talked about the formation of the original Lehigh Valley Rose Society and it gave me a date! October 17, 1947. I'm uploading an image of the article here, but I've also typed it up to make it easier to read.
The following text is from The Morning Call, Sunday, May 20, 1956 (Page 39):
-----------------
"Lehigh Valley Rose Society Active, Enthusiastic Group, Formed in 1947"
"Plans are progressing for the fifth annual rose show of the Lehigh Valley Rose Society scheduled to be held at the Americus Hotel, Allentown, on Friday, June 1.
The society itself will observe its ninth anniversary on Oct. 17, and was organized by a small group of amateur rose growers at a meeting in the home of Emile P. Sissung, 1201 S. 10th St.
Then and there, this small band of rose lovers organized the Lehigh Valley Rose Society by electing the following officers: President, Atty. Robert L. Stuart; vice president, Paul N. Bachman, Northampton; secretary and treasurer, Emile P. Sissung. These men, all members of the American Rose Society, who had been growing roses for a number of years and whose gardens were show places, centered their efforts in building up the membership and exchanging ideas and information for the betterment of all amateur rose growers. Various speakers addressed the small group. Pruning demonstrations were also staged in their gardens.
In addition to the officers selected at this first meeting, among the first members were Mrs. Lloyd Anthony, Ray E. Banks, Lester Bechtel, Mr. and Mrs. Robert Fritsch, Atty. Charles G. Helwig, Mrs. Herman Meckstroth, John A. Schroeder, Elmer D. Schuler, all of Allentown; Elmer C. Bratt, H. E. Clark, Bethlehem; Mr. and Mrs. Albert O. Mohr, and Mr. and Mrs. Arthur Ebert, Coopersburg, Rev. Paul Rahn, Northampton, and Charles F. Moyer, Slatington.
Atty. Stuart, who had guided the organization through its early stages, asked to be relieved of his office as president because of other pressing duties, and Atty. Roy A. Raebuck, a new recruit in the Rose Society, was elected to the presidency in 1952.
In the spring of 1952, the Society planned to stage a Rose Show and on June 6 the first show was set on the first floor of the Pennsylvania Power & Light Company building, Allentown.
The show caught on from the start. The influx of exhibits was so great that the committee was swamped and found it difficult to cope with the situation. Willing exhibitors joined in to get the roses placed in their proper classes. It is a known fact that members of the Society who had prize roses to enter, never had a chance to display them, because of the rush of other exhibitors and the great amount of work involved to get them placed before judging time. The committee in charge of the show consisted of Atty. Raebuck, Atty. Stuart, Mrs. John Soveka, Emile P. Sissung and Robert P. Fritsch.
Through this Rose Show, and the publicity the Society received, the membership increased and there were more willing hands to help share the burdens of the second Rose Show on June 3, 1953, held on the first floor of the Lehigh Valley Division of the United Gas Improvement Co., Allentown. Atty. Raebuck again headed the committee.
Because of his intense interest in the Lehigh Valley Rose Society, and roses in general, he has been the general chairman of the committee for all subsequent rose shows, and largely through his efforts the Rose Shows have been a decided success.
The third Rose Show was again staged on the first floor of the Gas Company office building on June 10, 1954. This, too, was a grand success with over 450 exhibits. The men exhibitors stole the show.
The following year, on June 3, 1955, the Rose Show was moved to the lobby of the Americus Hotel, Allentown. There were more than 500 entries. The exhibits entered by the men rose growers were again outstanding. More stress was laid on the Rose Arrangement Class at this show, and it proved to be a big attraction.
For this year’s show, additional room for the proper placing of exhibits and Rose Arrangement classes will be provided, since a greater number of exhibits and arrangements are expected at this fifth annual affair.
Exhibitors need not be members of the Society and there is no fee required to place exhibits or arrangements. The Society, however, invites all rose growers to become members, for they realize that in numbers only can this interesting and fascinating hobby be carried on.
Next Sunday, the Society will sponsor a rose grooming and conditioning demonstration at the Banks Rose Nursery, 1035 N. Tacoma St., Allentown, at 2:30 PM. The proper method of preparing rose blooms so they will be in their best form to exhibit at the show will be explained. The public is invited.
To the late Robert P. Fritsch, who passed away suddenly last fall and who had been elected to the presidency in January, 1954, must go a lot of credit for bringing the Rose Society to its present membership and prominence in the community. In his honor, and as a memorial to him, the Society will this year for the first time, award a trophy to the exhibitor who has the best rose in the show, officially designated as “Queen of the Show.”
This trophy as well as the other trophies to be awarded, remain the property of the Lehigh Valley Rose Society, but may be retained by the winners until the next show, when they must be returned to the Society.
A plaque, donated by Mr. and Mrs. A. P. Guerrero, Riegelsville, members and boosters of the Society, will be awarded to the winner of the Robert P. Fritsch Memorial Trophy. This plaque becomes the sole property of the winner.
For the first time this year, trophies will also be awarded in the Arrangement Classes. For the best arrangement in the show, the Clarence G. Harman Challenge Trophy will be awarded. Other trophies to be awarded in the Arrangement Classes may be retained by the winners.
Additional trophies to be awarded are, The Robert L. Stuart Challenge Trophy, for the six best exhibition blooms of different varieties of Hybrid teas and the Mariton Challenge Trophy for the three best medium or dark red teas. The former trophy was presented to the Rose Society by fellow members of the Lehigh Valley Bar Association in recognition of Atty. Stuart’s continued interest and devotion to the Rose Society, and as its first president.
The Mariton Challenge Trophy was donated by Mr. and Mrs. A. P. Guerrero, to instill interest in the Rose Society and as a means of spurring other amateur rose growers to put forth their best efforts to produce bigger and better roses. The Harman Challenge Trophy, was donated by Mr. and Mrs. Harman, because of their great love of roses and flowers in general.
Some of the first members of the Rose Society still retain their membership and take an active interest and lend their support toward furthering their hobby. Their rose gardens are among the show places in the city.
It is interesting to note, that Mrs. Robert P. Fritsch, relieved the late Mr. Sissung of some of his duties early in 1951, when his health began to fail. She served as treasurer until the spring of 1953, when, at the passing of Mr. Sissung, she was elected secretary and Arthur Ebert, Coopersburg, took over the treasurer’s duties. They still retain the same offices. The remaining officers at this time, are, President, Elvin E. Raub; vice president, Anthony Pesola, Bethlehem.
Schedules for displaying roses and arrangements at the next show, which will be held in the lobby of the Americus Hotel, Allentown, on June 1 next, are being mailed to all patrons, members, and last year’s exhibitors. Others may procure them by contacting the secretary.
Atty. Raebuck again is chairman of the general committee. He will be assisted by Mrs. Horace Houghton, Bethlehem, chairman of the Rose Arrangement Classes and Albert O. Mohr, Coopersburg, who heads the schedule committee."
-----------------
I am still looking for the date the original Lehigh Valley Rose Society ceased operations. The last "present tense" article I found was from 1997, so the original LVRS lasted for at least FIFTY years!
]]>It looked ugly and our kids ALWAYS tripped on it when they were playing in the yard. I told my wife, "You know, for their safety, I should probably do something about it this year. What about a new garden bed to incorporate it?" Her response? An eye roll with, "Fine." 😊
So I outlined a garden bed to connect from the pergola garden bed and hug the curve of the sidewalk to the edge of the fence, making sure to incorporate the sewer pipe. I started digging up the grass, loading it into a wheel barrow, then dumping it on a tarp in the garage to be dealt with at a later date.
After completely digging up the grass, I added Master Nursery Bumper Crop garden soil and manure.
I started to put down weed barrier, and pulled up the edging I put down on the pergola garden bed and bent it 180 degrees to connect it to the newest garden bed.
Weed barrier and edging down along the whole length of the newest garden bed.
Now, usually I'm not a fan of weed barrier. But you'll notice I'm using it extensively in this yard. There are SO many VERY aggressive weeds in this yard and trumpet vine shoots that continue to pop up EVERYWHERE despite my best efforts to pull them up and dig them out. I really prefer not spraying weeds (I TRY to stay organic as much as possible in my yard). So with the number of garden beds I'm adding in addition to the existing ones, with the extensive weed problem, and with my lack of time during non-COVID times, I cannot spend every day in my yard weeding. So despite some of the negatives of using weed barrier, in my case, I felt the "Pros" outweighed the "Cons," and I opted for adding it.
I decided for this garden bed, I wanted to add roses I had at our previous home, so that I'd have all of my "old roses" (even if they weren't my specific plants from my old home) in addition to adding many more. I ordered the following David Austin Roses: Molineux, Olivia Rose Austin, Boscobel, Munstead Wood, Charlotte, Lady Emma Hamilton, and Bishop's Castle.
When they arrived, rather than an "Olivia Rose Austin," I received a "Roald Dahl." I called them to ask if I could send it back and have an "Olivia Rose Austin" sent to me. They said, "You can keep it, we'll send out the correct rose to you too." Sweet!
Always a happy day to see these boxes arrive!
This is how bare root roses arrive - short canes with big roots - they're sent in a "dormant" stage, but I routinely find them with new buds already when they arrive.
The roots need soaked for a minimum of 2 hours before planting. I'm impatient, so I only do 2 hours. However, I know many people prefer to leave them overnight. I personally haven't noticed much of a difference. The important thing is to water them regularly once in the ground until they are established.
Measuring out the distance apart for each rose. I've gone with 30" apart for each rose. Far enough apart that they won't crowd each other, but close enough that they'll form a NEARLY solid hedge once fully-grown.
After much internal debate, I've decided the order I want to plant the roses in and I've put their garden markers in place so I remember as I dig and plant.
Before digging, I measure out an 18" x 18" square and cut it out of the weed barrier. Yes, you will still have to weed. But this "lets the soil breathe." While the weed barrier doesn't PREVENT water from going through, I still have to think that this allows more water to penetrate into the ground near the roots. But also, by measuring it out to 18" x 18", it gives you an outline of how big to make the hole.
I dig 18" x 18" and then I make sure it goes 18" down too. You want the soil to be broken up and loose so it's easier for the roots to grow. After the hole is dug, I take a spading fork and break up the soil below the hole a bit too.
I sprinkle mycorrhizal fungi on the roots (over the newly dug hole). This encourages root growth. I put the rose in place, fill the hole up with soil and pack it down gently; making sure the dirt is slightly mounded with the angles running away from the rose. This helps make sure there isn't water pooling around the base of the rose when it rains or when you water it.
Three roses down, four to go!
All roses in place, the bed is mulched, and the roses are watered. They don't look like much now, but believe it or not, in a couple months' time - they'll be 3' tall and blooming.
Stay tuned for part 5!
]]>After getting the new garden beds here done, my wife asked me to plant her an herb garden and she wanted it to be "somewhere convenient."
I decided I wanted to put the herb garden in front of the windows to our laundry room. At one point before we moved in, it was a garden bed. But it was neglected for years. I didn't really do too much to it except plant some salvia and phlox toward the right side. (There was SO much slate everywhere else in the existing part of the garden bed that I couldn't dig down anywhere).
I can't believe it, but I actually found a "before" picture of this section. I had planted the salvia and the phlox to the right in front of the wall and added a fresh layer of mulch last year just to do SOMETHING. But I thought it was so dumb to have this small strip of grass between the bed and the sidewalk, so I knew I wanted to do more with this area.
I wound up digging up the grass, I put a weed barrier down (I left the salvia and phlox in place because they seemed to be doing well where they were). I knew I didn't want to dig in this mess with all of the rock and all of the soil amendments that would most likely be needed. I've always liked the look of terra-cotta pots - nice and simple, bright orange/red, and fairly inexpensive. I decided to get several in various sizes to put herbs in and to put flowers in some to add additional color.
Around and in front of the stairs to the basement was grass too! I thought it was so dumb (it's as narrow as 4" at spots). I decided I wanted to make this mulch too so it all looks consistent and then a mower or weed whacker wouldn't be needed on this side of the sidewalk.
I didn't think the pots looked right sitting on top of the mulch, so I wound up slightly burying each one and liked the look much better. I added a couple rocks here and there between the pots, then mulched the whole bed.
I really like how it turned out. I am (once I find a good source) going to line the edge of the bed (along the sidewalk) with stones. If you notice, there's slate right in front of the steps. When I was planning on running stone the whole length of the garden bed, I thought, "Well what about the steps? You'd have to step OVER stones to go down the steps." So the slate was my solution to not having a "tripping hazard" once I do add the stone border. The stone will run from the edge of the bed to the slate, and then from the other side of the slate to the other edge of the bed.
At this point, my wife was saying, "Haven't you done enough this year?" (Translation, "Haven't you spent enough money on the yard this year?") My response, "Well we just cleaned up this garden bed and made it look nice, we made the pergola look nice and added those new beds in front of it, now this corner (the last existing garden bed in the backyard that was there when we moved in) looks even worse. I need to do this section this year too." "Okay."
Seriously, this is what it looked like. The "Before" picture for this next area.
We were here for last spring/summer and these hibiscus bushes did look very pretty in bloom. The bush on the left routinely has birds nesting. And apart from that, I decided that I didn't want to change EVERYTHING in the yard, so I figured I would leave these in place. But the weeds and ivy had to go.
This section is between the fence, the house, the pergola, and the sidewalk to the back hallway door. It gets a lot of shade. This is (again like the laundry room window garden bed was) a small garden bed with a small section of "grass." However, because of the shade, it was never really grass - mostly dirt and moss with a couple patches of weeds and a little bit of grass here and there. Not just that, but there's a gate to our side yard here and anytime it rains, you have to walk through mud to use the gate.
Because of all of those reasons, I decided to make this section one big bed with slate stepping stones going from the sidewalk out the gate (and to extend the garden bed outside of the gate to be in line with the existing one already out there).
Here, I have the path laid and mulched and I'm starting to work at weeding around the hibiscus bushes. It was raining the entire day I wanted to work on this section. My wife said, "It looks like you won't be able to garden today." So of course, I took that as a challenge and set up this tent. Rain free gardening all day!
Done weeding and mulching, but I felt like it needed something else.
Definition between the garden bed and the stepping stone path; that helped but it still needed a little something else.
So I added this adorable guy that I found at 4 Seasons Garden Center in Breinigsville. I knew the hibiscus bushes would get quite large and full as the season progressed, so I didn't want to add any additional plants.
The pathway continued out the gate (ending at the edge of what was the existing garden bed on that side of the house) - I just continued it from where it was to the edge of the garage.
I cleaned up the existing garden bed on the outside of the fence (it originally stopped about 2' before the gate; I extended it past the gate to the edge of the garage wall). I added this bird bath (also from 4 Seasons). I didn't add any additional plants because this corner has an existing hibiscus bush that gets quite large with a spirea that grows in it. It fills up the space quite nicely once in season.
What's that mulch bed to the left of the sidewalk heading to the other gate? The start of "Personal Gardening (Part 4)!"
]]>The Spotted Lanternfly (Lycorma delicatula) is an invasive pest in the United States. It is native to Asia and is thought to have arrived from China to Pennsylvania - first discovered in Berks County, PA, in 2014. Though originally found in Southeastern PA, as of May 2020, it has been reported as spotted in 26 PA counties (Allegheny, Beaver, Berks, Blair, Bucks, Carbon, Chester, Columbia, Cumberland, Dauphin, Delaware, Huntingdon, Juniata, Lancaster, Lebanon, Lehigh, Luzerne, Mifflin, Monroe, Montgomery, Northampton, Northumberland, Perry, Philadelphia, Schuylkill, and York). However, it is likely to be more widespread than that. The PA Department of Agriculture relies on reports by individuals throughout the state for their data.
In a research paper put out by Penn State (which can be found here) the annual economic impact to Pennsylvania agriculture could be as high as $99.1 million statewide.
A Spotted Lanternfly (SLF) generation lasts for 1 year. The eggs are laid in the fall - primarily on tree bark, but others have reported finding masses on decks, outdoor equipment, rocks, or siding as well. Really any solid surface outdoors will do. The egg masses look like dried mud.
Egg Mass (Photo Credit: E. Swackhamer)
Each egg mass can have 30 to 50 eggs. The eggs hatch in spring. Many report seeing their first nymph stage in late May/early June. I believe this year, the very first report in PA was from late April. They start out small (about 1/8 to 1/2 inch) in length and are black with white spots. Two days ago, I saw three in my garden beds (2 on a David Austin "Young Lycidas" [AUSvibrant, 2008] rose and 1 on a peony). If I wasn't carefully deadheading the roses, I wouldn't have noticed as they were truly very small. At this stage, they do not yet fly but are good jumpers.
The first three nymphal stages of SLF are black with white spots. The fourth nymphal stage before reaching their adult stage is red with white dots and black stripes.
SLF adults are found in July and are active through the summer and fall. This is the stage most people are familiar with - they're about an inch long with black bodies and brightly colored wings. At this stage they can both jump and fly. Their wings typically remained closed unless in use.
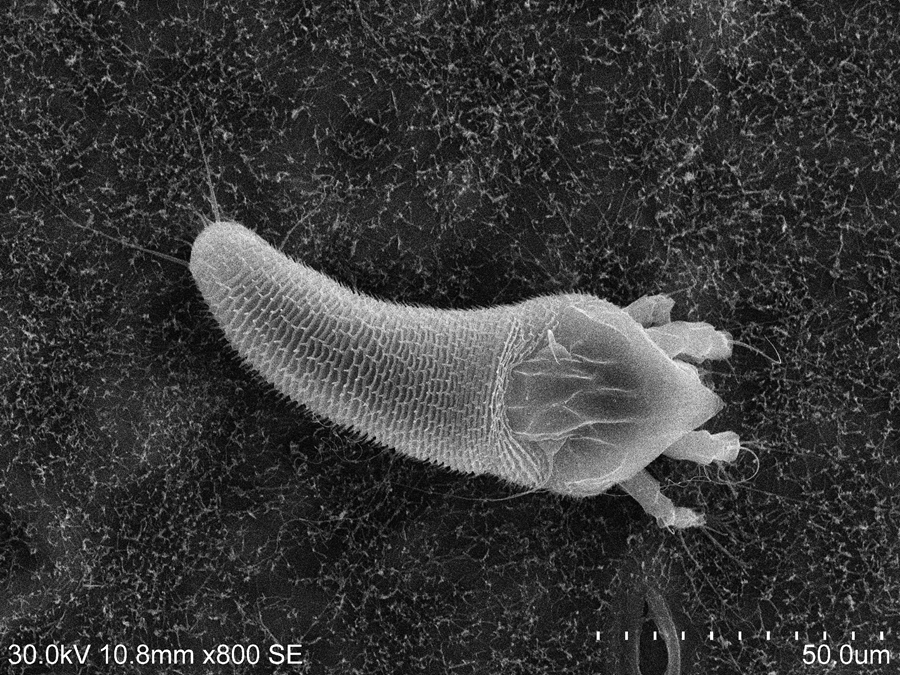
Early nymph stage - about 1/8" (found late April through July) (Photo Credit: PA Dept of Agriculture)
Late stage nymph - about 1/2" (found July through September) (Photo Credit: PA Dept of Agriculture)
Adult, Wings Closed - about 1" (Found July through early December) (Photo Credit: PA Dept of Agriculture)
Adult, Wings Open (Photo Credit: PA Dept of Agriculture)
SLF was primarily thought to go after certain fruit-bearing trees, vines, tree-of-heaven, and certain tree saplings. At this point, they're known to infest at least 65 different plant species.
Last year, I personally noticed (and reported to the Penn State Extension) that their early nymph stage was very attracted to my roses as well as the new growth on our trumpet vines (which we have since removed - more on that can be read in our other blog posts). This year, I am seeing widespread reports of SLF nymphs infesting roses, peonies, and hydrangeas, from LVRS members; as well as members in various gardening groups across the state.
New data suggests that roses, grapevines, and tree-of-heaven seem to be their primary food source when the eggs hatch (and will be most destructive for these plants in May and June). Once they are in their adult stage, then their focus shifts to trees such as black walnut, butternut, river birch, willow, sumac, silver maple, red maple, etc.
On roses, the nymphs pierce into the new growth with their mouth and feed like they're using a straw. They excrete a substance called "honeydew" which is a sugar-rich waste product. This encourages the growth of black spot on roses. Last year, even with weekly preventative treatments for black spot, I still had to resort to heavily pruning my roses several times throughout the year. Once in their adult stage, they left my roses alone and I was able to enjoy some blooms in late July through October.
On other plants, the damage is similar. The honeydew acts as a substrate for sooty mold and various fungi that thrive in sugary environments. Left untreated, this acts as a major plant stressor. This leaves the plant overall less healthy and its even more susceptible to other stressors (diseases, weather, additional pests). It can be responsible for canopy dieback on trees or cause death for flowers, tree saplings, and vines.
Because of how mobile these pests are, there is no way to PREVENT them from moving onto your property and measures need to be continuously taken to keep them controlled.
So you may be asking yourself: "What do I do to get rid of these monsters?!" There are several steps we can all take to try and slow their spread. The first step starts from September through May:
Egg Scraping - Walk around your property and check for egg masses (pictured above). Remember, they are not just on trees - look on the side of your house, on your deck, your shed, cement blocks, outdoor equipment, rocks, etc. Take a plastic card (like your LVRS membership card? 😉) or a putty knife works really well too. Scrape them into a bag/bottle/container filled with rubbing alcohol (or all that stockpiled hand sanitizer 😅). They can also be smashed. Remember, every mass has between 30 - 50 potential SLF's in them that will go on to destroy plants and have their own egg masses. Every single mass you destroy DOES make a difference even if it doesn't feel like it.
(Photo Credit: PA Dept of Agriculture)
Tree banding - now these have been controversial because left "as is" they can injure and even kill birds, bats, etc. HOWEVER, they can be safely used with some minor modifications. These sticky bands can be found from local garden centers or ordered online - simply use some pushpins to secure them in place. Please see the picture below:
(Photo Credit: Heather Leach)
The tree band is a sticky band that is wrapped around the trunk of a tree. Originally, these were not covered and birds and bats were getting stuck. However, if you cover the band in chicken wire, it is still effective for catching SLF but it prevents other animals from getting stuck.
Another type of tree trap is a funnel-style trap (mesh wrapped around the tree leading to a container to trap SLF). Some companies produce these traps commercially or you can make your own. This style of trap is pictured below:
(Photo Credit: Unknown)
Insecticides - Contact insecticides to control nymph and adult SLF:
Active Ingredient | Toxicity to Birds | Toxicity to Fish | Toxicity to Bees | Activity Against SLF | Residual Activity |
---|---|---|---|---|---|
Bifenthrin | M | H | H | Excellent | Excellent |
Beta cyfluthrin | S | H | H | Excellent | Excellent |
Carbaryl | S | H | H | Excellent | Poor |
Zeta-cypermethrin | S | H | H | Excellent | Poor |
Malathion | M | H | H | Excellent | Poor |
Natural pyrethrins1 | N | H | M | Excellent | Poor |
Tau fluvalinate + tebuconazole | H | H | N | Excellent | Poor |
Neem oil1 | — | H | H | Good | Poor |
Insecticidal soaps1 | N | N | N | Good | Poor |
Essential/botanical oils1,2 | — | — | — | Good | Poor |
Paraffinic oil or horticultural spray oil1 | — | — | — | Good | Poor |
Spinosad1 | S | S | H | Variable | Poor |
Beauveria bassiana | N | N | S | Under evaluation | Poor |
N = nontoxic; S = slightly toxic; M = moderately toxic; H = highly toxic; — = data not available.
1Some products allowed for organic production.
2There are many products containing essential oils which vary widely for efficacy against SLF. The two products tested against SLF were “SLF Killer 2" and “Purely Green."
Insecticides - Systemic insecticides to provide longer periods of control on adult SLF:
Active Ingredient | Toxicity to Birds | Toxicity to Fish | Toxicity to Bees | Application Method | Recommended Timing | Activity Against SLF | Residual Activity |
---|---|---|---|---|---|---|---|
Dinotefuran | — | — | H | Soil drench | July to September | Excellent | Excellent |
Dinotefuran | — | — | H | Trunk spray | July to September | Excellent | Excellent |
Dinotefuran | — | — | H | Trunk injection | July to September | Excellent | Excellent |
Imidacloprid | M | M | H | Soil drench | After flower to July | Variable | Variable |
Imidacloprid | M | M | H | Trunk injection | July to September | Good | Excellent |
N = nontoxic; S = slightly toxic; M = moderately toxic; H = highly toxic; — = data not available.
Note: The listing of any products in these tables is NOT an endorsement OR specific recommendation of any products. Other products with the same active ingredient should also work in the same way, but they may have different rates or formulations. For use in Pennsylvania, be sure the product is registered for the site and purpose of use (e.g., vegetable garden versus ornamental trees). These tables are based on the experiments Penn State Extension has done to date and should not be considered final or complete.
Disclaimers on Insecticides from the Penn State Extension:
Water Contamination
Every precaution should be taken to protect surface water and groundwater from pesticide contamination. Trunk injections pose the smallest risk to contaminating water because the insecticide goes directly into the tree. Soil drench applications should only occur directly adjacent to the trunk of the tree, as directed on the label. Soil drenches should not be applied to sandy soils or where the water table is shallow. Both dinotefuran and imidacloprid can persist in groundwater for extended periods. When exposed to sun, both of these compounds break down readily. To protect surface water, systemic insecticides should not be applied near open water sources (ponds, lakes, streams).
Pollinators and Other Insects
Many of the trees on which SLF have been observed feeding in high densities are also pollinated by bees (e.g., maples and oaks). It is possible that trees treated with systemic insecticides could have insecticide residue in the flowers and nectar the following spring. Neonicotinoid insecticides, in particular, have been associated with bee health decline. Additionally, there are many native insects that utilize these trees at the same time as SLF (e.g., caterpillars, beetles, lady beetles, lace-wings, parasitoid wasps) and could be affected by the treatment. Pyrethroids can also be damaging to beneficial insect populations and could cause populations of secondary pests, such as mites and scale, to increase. Generally, systemic insecticides are considered to have a reduced impact on beneficial insects compared to broad-spectrum foliar-applied insecticides. We are currently conducting research to determine the effect of SLF treatments on pollinators and other non-targets.
---------------------
If you see SLF, please report sightings here.
Data in this post was pulled from the Pennsylvania Department of Agriculture, the Penn State Extension, and the United States Department of Agriculture.
The blog post "Featured Image" is of Lorraine Phillips removing Spotted Lanternfly nymphs from her roses. (Photo Credit: Jessica Griffin). It was taken from an article written by Maria Panaritis of "The Philadelphia Inquirer." The article can be found here.
]]>A funny little back story, my wife and I met in college. We were both Forensic Anthropology majors; a very small program, I think there were about 8 in our major for the class of 2014. Apart from several biology, chemistry, and anthropology courses, we had to take an Intro to Archaeology course. In the course, we learned to "stake out" a dig site into quadrants, as a way to keep track of what you've dug up from specific areas. It helps to create a "map" of the site (a large amount of bone fragments for example could be a burial site, whereas pottery fragments and charred wood could be an indication of where they cooked their food). This was the only "field experience" we had. Otherwise, we worked in the osteology lab sorting and identifying what the archaeology majors dug up.
Anyways! This Intro to Archaeology course came in handy for gardening. We staked out where the new garden beds would be and started digging. 😅
(Here my wife poses with her handiwork.)
(The girls are helping to dig out new beds too!)
(New garden beds ready to go!)
We dug these two garden beds in front of the lattice sections of the pergola. Each garden bed is about 4' x 8'. We dug down about 2' the whole way through to remove as much rock as possible and as many trumpet vine roots as possible. The old soil was not great, and our grass was not great. So we decided to take the dirt we were digging up, spread it out in the grass part of our yard, put down grass seed, then cover it in a thin layer of "grass soil." We filled these two new garden beds with Master Nursery "Bumper Crop" soil and cow manure. After digging out these new garden beds, I put down a weed barrier (our yard is notorious for weeds and of course, baby trumpet vine shoots have a tendency to pop up all over!)
(Weed barrier and edging in place. Notice the little metal sign in each garden bed? I'll get to that soon!)
Being the huge David Austin fan that I am, I knew I wanted to plant climbing roses on this pergola. After receiving my 2020 David Austin Roses Handbook in the mail, and after browsing their website and various blogs/Facebook groups, I decided on purchasing two "The Generous Gardener" roses. I ordered them directly from David Austin (in the United States, they ship their roses from Tyler, Texas) as bare root roses.
Bare Root Roses:
Bare root roses are pruned to be a few fairly short canes with bare roots - meaning they're not potted in dirt and sent in a somewhat dormant state. I really like ordering roses this way because:
1. It's cheaper - both for the rose itself and the shipping costs are lower because they weigh much less.
2. It's "greener" - no plastic containers that get thrown away as soon as the rose is put in the ground.
3. It's less of a "shock" for the rose. Since the rose is pruned quite short, the roots (the "below ground" part) are usually bigger than the canes (the "above ground" part). Rather than expending its energy on trying to maintain several large canes, leaves, and buds, it can focus on growing out its root system first.
Quick Bare Root Planting Tutorial:
When you receive your bare root roses in the mail, the first thing to do is to set them in a bucket of water (just the roots) and soak them for at LEAST 2 hours (many people decide to let them soak overnight). This helps to wake the rose up from its dormant state.
You want to dig a hole at least 18" x 18" x 18" to accommodate the roots. I measure out and cut an 18" x 18" square in the weed barrier I place down. This helps me make sure I dig a big enough hole, but it also helps the rose to "breathe."
After you've dug the hole, make sure to loosen up the soil at the bottom of the hole as well. Place the rose so the bud union (where the rose is grafted onto the roots - a roundish knobby section) just below ground level. It's a good idea to have a stick or rod of some sort handy to place flat across the hole rather than "eyeballing" it.
Gently fill the hole with a good gardening soil (I really like Master Nursery "Bumper Crop.") You want to mound it up just slightly around the rose so water runs away from it rather than toward it. Then you want to water the rose thoroughly (I like to add fish fertilizer the first time, and then about once a week throughout the spring and summer). Make sure to water the rose every day until well-established.
Note on Climbing Roses/Ramblers:
When you're dealing with climbers or ramblers, it's good to plant the roses at a 45-degree angle with the canes pointed toward what you would like to train it up and the roots pointed away.
Rose Markers:
I said I would get to it soon! Before we moved to Bethlehem, I had several David Austin roses of different varieties. I drew up a blueprint of my garden beds and labeled the placement of each rose on it. It was a lot of work and it really only benefitted me, not the casual passersby who were curious what varieties of roses where there. So for this garden, I decided I would create rose markers - easier and everyone benefits from them. In my searching, I found "Orion Garden Marker," a small business based in Arizona that engraves garden markers of various sizes and out of various materials. I picked their engraved zinc markers and designed a template using the common name, patented name/release year, and breeder for each of my roses. Dale at Orion Garden Marker was absolutely fantastic to work with, and I've placed (I believe) 4 separate orders with him now. They are reasonably priced and have a very quick turnaround time.
(I think they've turned out great!)
Planting these two "The Generous Gardener" roses and mulching these beds were the end of my ORIGINAL plans for this year. I originally figured my other garden projects would happen in later seasons as I had time to get to them.
(One of "The Generous Gardener" in place. This is what they look like when shipped bare root, but quickly "leaf out.")
Stay tuned for part 3 - these are taking a lot longer to write than I initially anticipated! 😅
]]>Starting in mid-March, with COVID-19 and a "non-essential" classification, I found myself with a lot of extra time on my hands. I needed to do something to keep me busy and help relieve some anxiety over a loss in income. So what did I do? I threw myself into my yard.
The first project for the year was to address the pergola. This was built (if I had to guess) about 20 years ago. A structure that's about 15' x 25' - one of the long sides is against our garage and the other long side has two 8' wide lattice sections with an archway in between. Under the pergola is a brick patio. When it was built, a well-meaning gardener planted one trumpet in front of each lattice section. In the (estimated) 20 years since then, they grew to cover the entire pergola, draped over all 4 sides, up onto the garage roof, wrapping around the satellite dish on the garage, and stood about 8' above the TOP of the pergola as well. Its tendrils melded into the wooden structure. Its vines snapped the lattice sections to pieces. Its roots upended several bricks. Each original vine's trunk grew to be nearly a foot in diameter. The vines became home to at least 200 birds (at any given time) leaving a nearly solid layer of bird poop on the patio and anything else placed below the canopy.
|
(Believe it or not, this isn't even it at its worst.)
In the spring and summer of 2019, my wife and I cut back the trumpet vines three times ourselves. A landscaper cut it back twice as well. We felt like we could not enjoy the patio (and the backyard as a whole) without getting pooped on by birds. I built a raised vegetable garden in the back corner of the backyard and shifted most of my focus to the front yard that season.
In late February 2020, I decided I wanted to get a handle on the trumpet vines before they started growing this year. I cut about a 2" section out of each of the old growth vines coming off of the trunk of both original vines. This was to separate everything on the pergola from the roots. In March, when I had more time, I started to remove the vines from the lattice sections of the pergola. At first thought, I figured I would create a pile in my garage and when the compost center opened up April 1st, I'd haul it there to dump it off. As I continued removing it first from the lattice sections, and then from the top of the pergola, I realized that it would be a MUCH bigger project than I originally anticipated. But I kept going, and kept stacking it in the garage.
In several sections, I had to chisel away the vines where the tendrils dug into the wooden pergola. After it was completely removed, I removed what was left of the lattice sections and completely rebuilt them. My wife helped me to clean the pergola and repaint it (a fresh medium-dark gray that matches the white and black of our home and the gray shutters of our neighbors). BUT due to COVID-19, the compost center wound up being closed indefinitely. Unsure what to do with all of this yard waste, we rented a 10 yd dumpster and COMPLETELY filled it with the trumpet vines. But now I had a clean slate to start my gardening projects.
(A clean slate to begin my 2020 gardening!)
See the next blog post to find out what happened next!
]]>Today, I worked on adding a couple additional functions to the website. I added a PDF download of our membership form that can be printed out and mailed in with a check. You can find that form here, or under the Membership page.
I also added an online checkout option for current American Rose Society members that are interested in joining Lehigh Valley Rose Society (the area local chapter organization). This option is available only to those that are current members (this calendar year) of ARS. You can find this option here, or under the Membership page.
Member Cards:
I've placed an order with 4ColorPrint.com for 500 plastic membership cards. There was a good price break at this quantity. These will be distributed to all current members as soon as we receive them (and new members when they sign up). Our local Member Benefit Partners are being told to ask to see your card at checkout, so make sure to keep it handy in your wallet.
American Rose Society:
I've been in communication with the ARS office in Shreveport, LA. Their office is currently closed due to COVID-19. We are submitting new member information to them as soon as we receive it. However, their staff is only going into the office a couple times a week, so processing times are longer than usual and communication is slower than usual. I was told that all April member welcome packets just went out last week. Please be patient and understanding given the situation. Thank you!
Events:
I have several events planned in my head (both social events and demonstrations), but with COVID-19 and social distancing restrictions, nothing is officially scheduled at this point. As soon as we are able to schedule events that can be held safely we will post about them on our social media pages, on this blog, and reach out via email to our members.
New Members:
At the time of writing this blog post (8:30 PM on 05/13/20) we have had two new members sign up this week.
]]>
They are now offering LVRS members 15% off of all plants and 10% off of everything else (excluding already discounted items).
After a lovely chat on the phone with Amy, their manager, I decided to head out to their garden center to check out what they have. I left with 2 Kordes Roses, some perennials, and an adorable elephant garden statue. How much did I save with this new member benefit? $17.01! You'll be able to recover your annual LVRS membership in no time with this new benefit alone - not to mention all of the other benefits you receive with membership in LVRS! 😉
4 Seasons Garden Center is open during COVID-19 and are taking all recommended precautions - no customers allowed inside the store; just the greenhouse and outdoor sections - social distancing and contactless credit/debit card payments.
They have a HUGE selection of pots. And (I believe) this shipment of garden statues just came in today - with several very nice options to choose from and they were all VERY reasonably priced. Lots of trees and bushes for sale outside and many herbs and vegetables in the greenhouse (as well as some lovely perennials and annuals).
When I spoke to Amy on the phone, she immediately said, "We don't typically carry many roses, usually landscape roses, but that can change and I would certainly be willing to consider signing up with David Austin." (Music to my ears!)
When I went today, I'm assuming they haven't received rose shipments for this year yet (as most nurseries in the area haven't, so what they have in stock is probably what they have from last year). Even so, there was still a decent number of roses to choose from. I did see a lot of different double knock-outs, knock-outs rose trees, etc. as expected, but they do also carry Kordes roses - which I was excited to see.
Kordes Rosen is a German rose brand that really has some lovely varieties. Many refer to them as "the German David Austin Roses" - though it may be more correct to refer to David Austin Roses as "the English Kordes Rosen" (as Kordes is the older brand!)
Now their Kordes roses are not marked as distinctively as a David Austin Rose would be; perhaps a reason why more people are familiar with DA roses than Kordes roses. They don't say "KORDES" in big letters anywhere. If you look at the back of the tag for each variety, the patented name for the variety is listed with care instructions. Rose varieties patented by Kordes start with KOR. So the back of the tag may say, "KORgeowim." For David Austin Roses, the first three letters on their roses will be "AUS."
A selection of garden statues (I left with one of the sitting elephant statues).
Some of the many trees and shrubs currently available.
Newly in-stock annuals & perennials out on display by the parking lot.
Some of the "Kordes" roses they have in stock.
I left with an "Earth Angel" and a "Lemon Fizz" rose.
Some of the pots (and a bench) they have in stock.
I loved these pots! I almost left with one even though I don't even currently need any!
A view of one isle of the greenhouse - lots of annuals and perennials in stock!
The other isle of the greenhouse - lots of vegetables and herbs available too.
Seriously, I don't think I've ever seen such a big selection of flower pots to choose from - anywhere you looked, there was another display with more options.
They have lots of dirt, mulch, and stone available (from gravel to boulders).
Beautiful pots for sale!
What came home with me today!
We are ready to start advertising to build up a membership base of enthusiastic professional and amateur rosarians! But to do this, we need funds to: pay for website hosting, order flyers, order business cards, pay for social media ads, and more! If you are able to donate, please consider doing so through this link. And/or join our members! We would love to have you.
David Austin Roses - "Kew Gardens" - Ausfence - 2009
Click here to browse the items currently listed.
A LVRS unisex t-shirt pictured in the color "heliconia" - this t-shirt is available in SIXTEEN different colors in sizes ranging from S to XXXL.
With the COVID-19 pandemic forcing me into a temporarily unemployed state, I found myself with a lot of extra time on my hands and a lot of extra stress. I retreated into my yard more so than usual as a way to relieve the stress and eat up the time. While digging out new garden beds for new roses, I realized, "Now is the time! Not when I retire, I need to do this now!"
I found several Facebook groups of amateur and professional rosarians and gardeners and quickly realized - many are finding solace in their yard at this time. Many people that would usually not be outside much, are now spending more time out in nature and appreciating the beauty of the earth.
With the virus spreading and the number of infected increasing (as well as the number of deaths increasing) there is something cathartic about planting plants, seeing new shoots and buds, and watching flowers blossom. Our yards - these plants, have no idea there's a pandemic going on.
Even if we cannot currently have meetings, events, and demonstrations in person at this time, we can come together as a community of gardeners and rose enthusiasts to support each other; to ask for help and advice with gardening, and to brighten each other's days with pictures of our yards.
A picture of 4 David Austin "Young Lycidas" roses about 1.5 months after I planted them last year in front of our home.